Air Fryer Crispy Chicken Wings (The Baking Soda Method)
By Chef Hamid | Homely Recipe
The Science of Home Cooking
🍗 Here Is What Keeps Going Wrong With Your Air Fryer Wings
You followed the recipe. You set the temperature to 400°F. You flipped them halfway through. You pulled them out at the fifteen-minute mark, plated them with hope, and bit down into something that can only be described as rubbery leather with a side of disappointment.
I know this story because I lived it for months.
Over the course of testing more than twenty pounds of chicken wings across dozens of batches, I chased the same goal every home cook with an air fryer has chased: that shatteringly crispy, golden, bubbled skin you get from a proper deep fryer or a serious restaurant kitchen — but without the mess, the oil, or the fear of setting off the smoke alarm.
Most air fryer wing recipes fail for the same quiet reason. They treat the air fryer like a magic box that automatically crisps anything you put inside. But skin does not work that way. Chicken skin is approximately 60% water and 40% protein and fat. If you do not actively intervene in that structure — if you do not chemically change the way the proteins behave under heat — you are just baking wet skin in circulating air. That is how you get rubbery wings.
The breakthrough came when I started testing a method borrowed from Chinese roast duck kitchens and adapted by serious wing obsessives across the internet: the baking soda method. One-quarter teaspoon of ordinary baking soda, tossed with the wings and allowed to rest, fundamentally changes the pH of the skin and transforms the texture in a way that no amount of extra heat or cooking time ever could.
This is not a trick. It is chemistry. And it works every single time.
🔬 The Science Behind the Baking Soda Breakthrough
Let me explain exactly what is happening when you add baking soda to chicken wings before air frying them.
Baking soda — chemically known as sodium bicarbonate (NaHCO₃) — is a base. When you toss it with raw chicken skin, it raises the pH level of the surface from roughly neutral (around pH 6) to alkaline (closer to pH 8 or 9). This shift in pH does something crucial: it begins to break down the peptide bonds in the proteins that make up the skin’s structure.
In simple terms: the baking soda weakens the protein network just enough that when heat is applied, the skin does not tighten and toughen the way untreated skin does. Instead, it bubbles, crisps, and develops that signature cratered texture you see on the best restaurant wings. The alkaline environment also encourages the Maillard Reaction to occur more aggressively at lower temperatures, which means you get deeper browning and more complex flavor faster.
Here is the chemical reaction that occurs when baking soda is exposed to heat:
NaHCO3+Heat→Na2CO3+H2O+CO2
Sodium bicarbonate breaks down into sodium carbonate, water vapor, and carbon dioxide gas. That release of CO₂ is part of what creates the tiny bubbles and pockets in the skin as it crisps — mimicking the texture you would get from deep frying at 375°F in several quarts of oil, but using nothing more than hot circulating air.
The method is shockingly simple. You toss the wings with a small amount of baking soda, let them rest uncovered in the refrigerator for at least thirty minutes (or up to overnight), then air fry as usual. The resting period allows the baking soda to do its work on the skin surface while also promoting moisture evaporation — setting you up for maximum crispness the moment the wings hit the heat.
🛒 Pro Buying Guide — What to Get and Where
The Wings: Costco’s Party Wings are hands-down the best value in America for this recipe. They come already separated into flats and drumettes, which saves you ten minutes of knife work and eliminates waste. The packs are typically 4 to 5 pounds, which is perfect for feeding a group or batch-cooking for the week. Walmart and Kroger also carry solid options — look for wings labeled “split” or “party-style” to avoid the tedious job of cutting through joints yourself.
The Baking Soda: Not all baking soda is created equal for cooking. Bob’s Red Mill Baking Soda is my go-to because it is aluminum-free and has a consistent grain size that distributes evenly over the wings. You can find it at Whole Foods, Kroger, and Target. If you are using the generic Arm & Hammer box from your fridge, make sure it is fresh — old baking soda loses potency and will not raise the pH as effectively.
The Buffalo Sauce: If you are going the classic buffalo route, Frank’s RedHot Original is non-negotiable. It is widely available at every major grocery chain in the USA, and the flavor profile — vinegar-forward, medium heat, slightly tangy — is what people expect when you say “buffalo wings.” For the butter component, I use Kerrygold Unsalted Butter. The higher butterfat content emulsifies better with the hot sauce and clings to the wings in a way that standard American butter does not quite achieve.
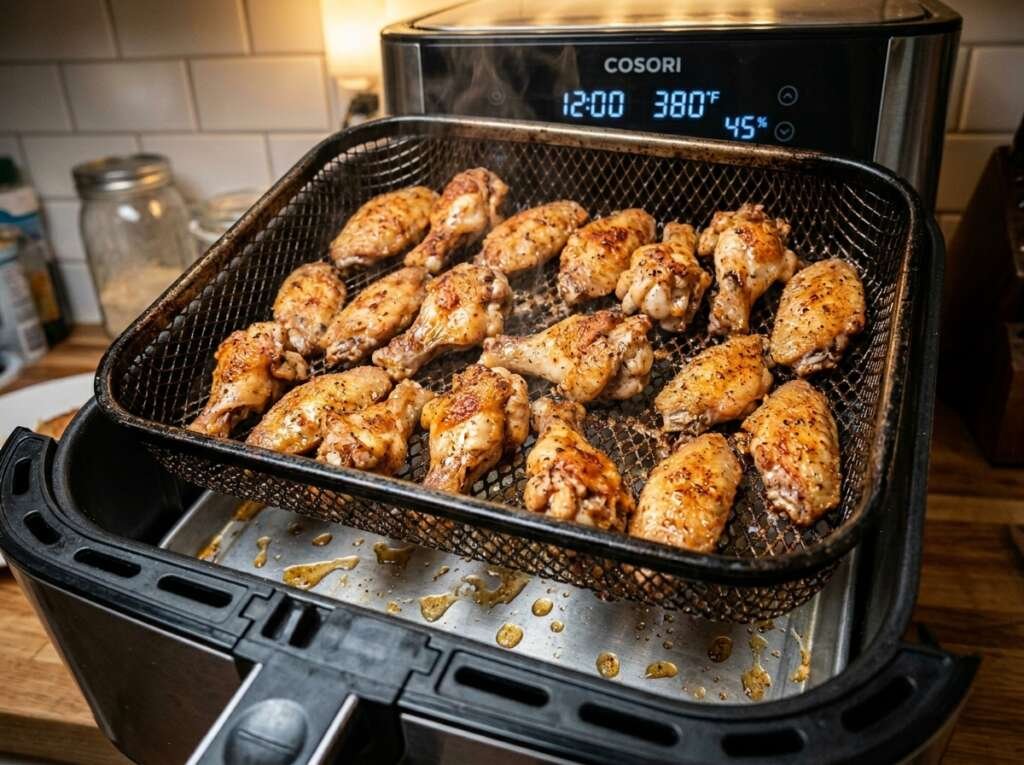
The Air Fryer: For wings specifically, you want an air fryer with at least a 5.8-quart capacity and a basket design that allows proper air circulation. The Ninja Max XL and COSORI Pro 5.8QT both perform exceptionally well and are available at Target, Walmart, and Best Buy. Avoid the smaller 3-quart models — you will be forced to cook in three or four batches, which kills the momentum of getting wings on the table.
📋 Ingredients
| Ingredient | US Customary | Metric |
|---|---|---|
| Chicken wings (flats and drumettes) | 3 lbs | 1.4 kg |
| Baking soda | 1 tsp | 4g |
| Kosher salt | 1 tsp | 5g |
| Garlic powder | 1 tsp | 3g |
| Smoked paprika | ½ tsp | 1.5g |
| Black pepper, cracked | ½ tsp | 1g |
| Avocado oil or olive oil | 1 tbsp | 15ml |
| Frank’s RedHot Original | ½ cup | 120ml |
| Kerrygold unsalted butter | 4 tbsp | 56g |
| Fresh parsley, chopped (garnish) | 2 tbsp | 8g |

⚠️ Common Mistakes Table
| The Mistake | What Actually Happens | The Fix |
|---|---|---|
| Using too much baking soda | Wings taste soapy or metallic; texture becomes mushy | Use exactly 1 tsp per 3 lbs of wings — no more |
| Skipping the rest period | Baking soda does not have time to raise pH; wings stay rubbery | Rest uncovered in fridge for minimum 30 min, ideally 2–4 hours |
| Cooking wings straight from fridge | Cold wings drop air fryer temp; uneven cooking results | Let wings sit at room temp for 15–20 min before cooking |
| Overcrowding the basket | Wings steam instead of crisp; no air circulation | Cook in batches — single layer only, small gaps between pieces |
| Not patting wings dry after resting | Excess moisture prevents crisping | Pat wings thoroughly dry with paper towels before seasoning and cooking |
| Pulling wings at 165°F internal temp | Safe, but skin is not fully rendered; chewy texture remains | Cook to 190°F internal — collagen breaks down, skin crisps fully |
👨🍳 Step-by-Step Method
Step 1 — Apply the Baking Soda and Rest
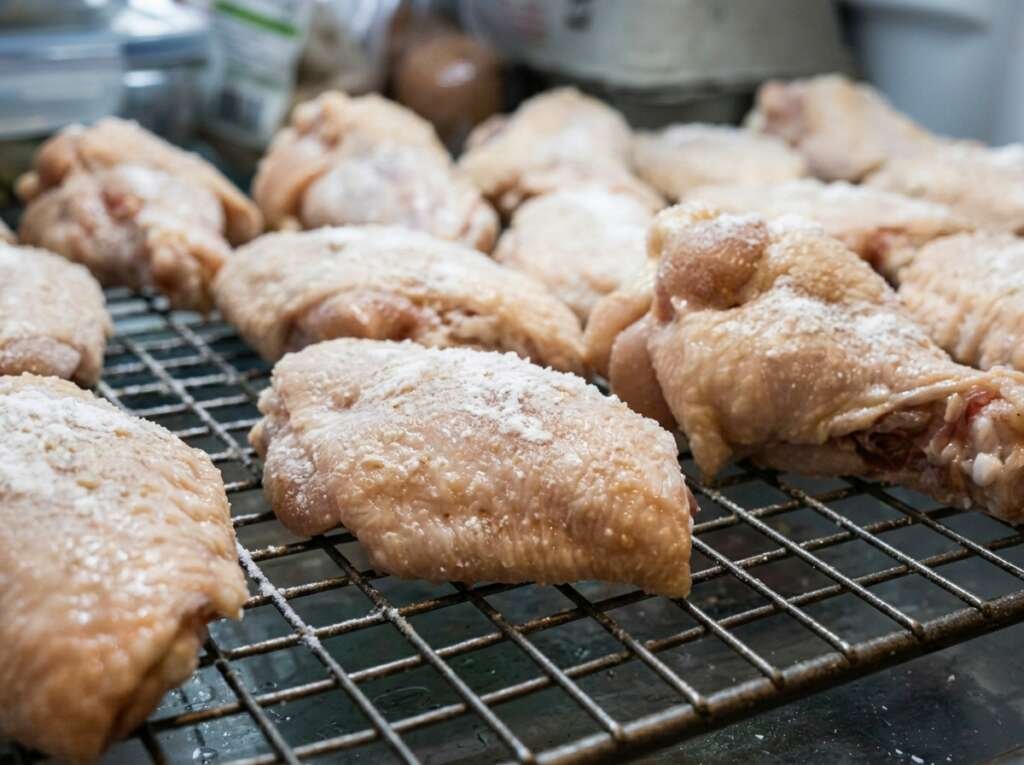
Remove your wings from the packaging and pat them completely dry with paper towels. Moisture is the enemy of crispness, so take your time here. Lay the wings out on a wire rack set over a sheet pan — this setup allows air to circulate around every surface during the resting period.
Sprinkle the baking soda evenly over all the wings. Use your hands to toss and massage the baking soda into every piece, making sure the skin is lightly coated. You will notice the surface of the skin becomes slightly tacky within a few minutes — this is the baking soda beginning to interact with the proteins.
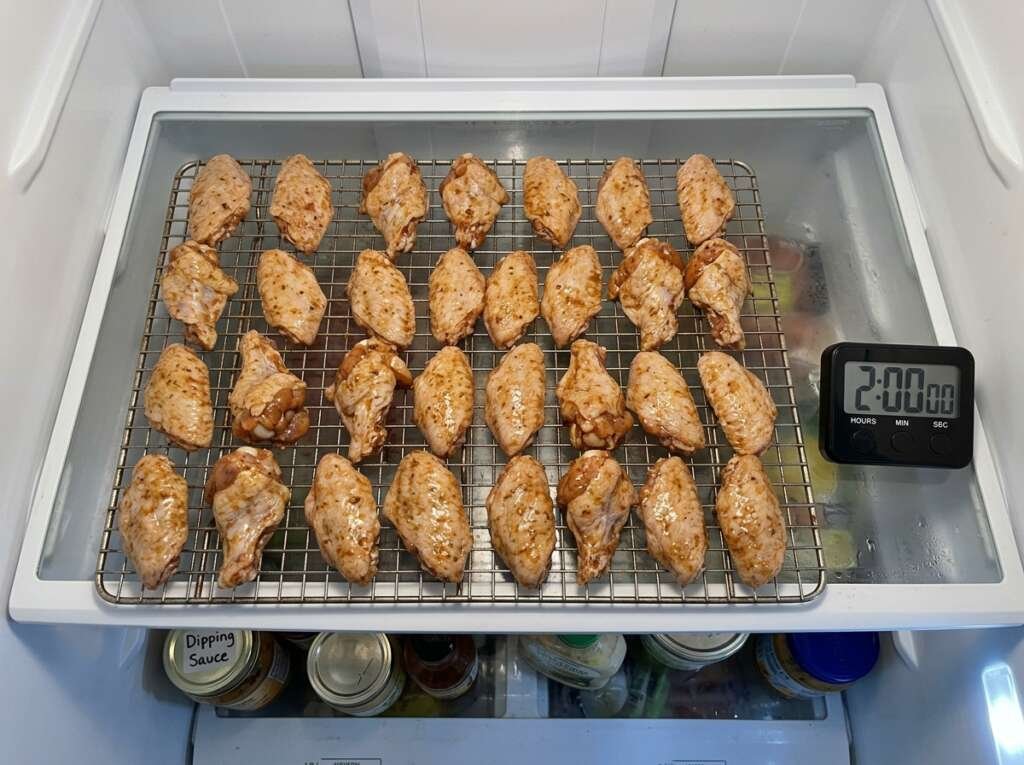
Place the entire rack uncovered in the refrigerator for at least thirty minutes. If you have the time, two to four hours produces even better results. The cold, dry air of the fridge promotes surface moisture evaporation while the baking soda does its chemical work.
Step 2 — Season and Bring to Room Temperature
Remove the wings from the fridge and let them sit at room temperature for fifteen to twenty minutes. This step ensures even cooking from edge to center. While the wings are resting, preheat your air fryer to 400°F / 204°C for five minutes.
In a large mixing bowl, combine the kosher salt, garlic powder, smoked paprika, and cracked black pepper. Add the wings and drizzle with the avocado oil, then toss everything together until each wing is evenly coated with the seasoning blend. The oil acts as a conductor, helping transfer the air fryer’s heat directly to the skin surface.
Step 3 — First Cook — Rendering the Fat
Arrange the wings in the air fryer basket in a single layer with small gaps between each piece. Do not stack or overlap — air needs to flow around every surface for the baking soda method to deliver its full effect.
Cook at 400°F / 204°C for twelve minutes without opening the basket. During this phase, the fat beneath the skin is rendering out, and the surface is beginning to dry and tighten. Resist the urge to check on them — every time you open the basket, you drop the internal temperature and slow the crisping process.
Step 4 — Flip and Finish
At the twelve-minute mark, open the basket and use tongs to flip every wing. You should already see golden browning beginning to develop on the surfaces that were facing the heating element.
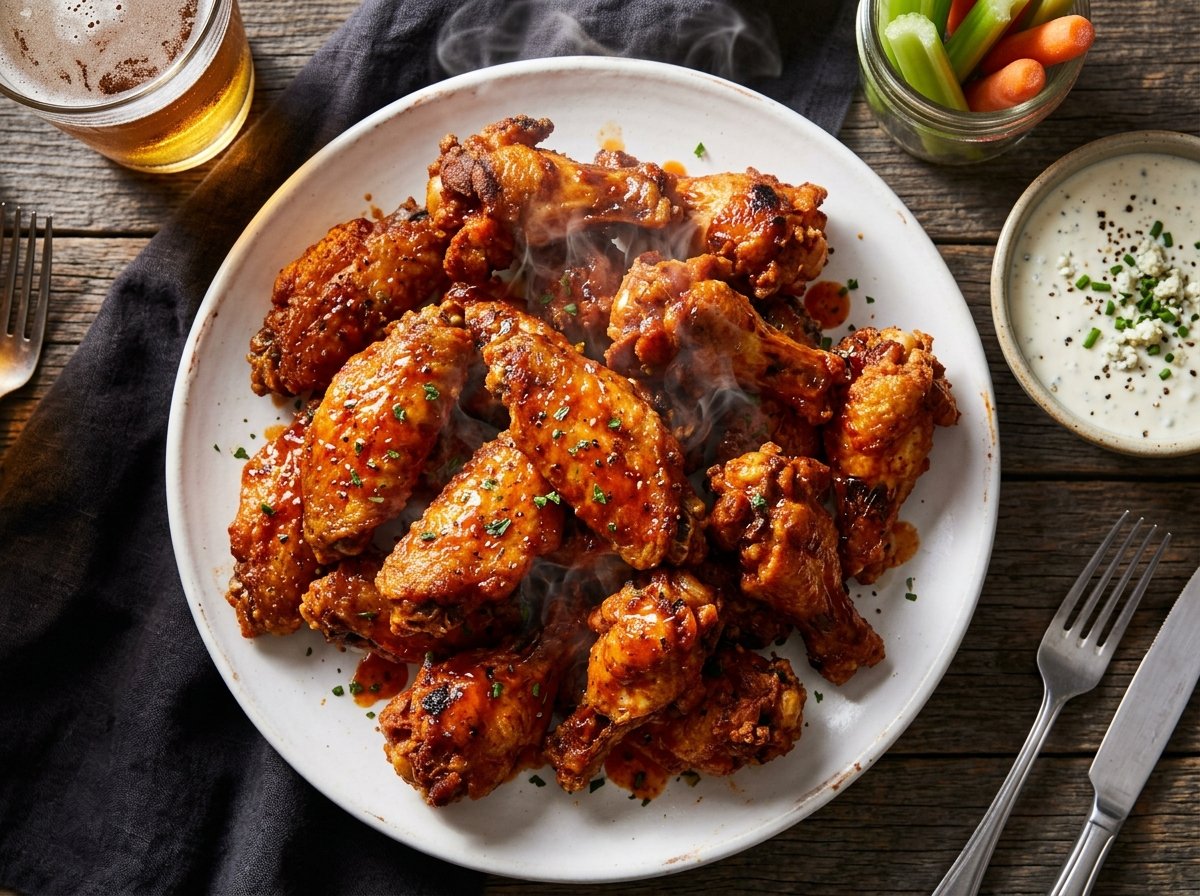
Cook for an additional ten to twelve minutes, checking at the ten-minute mark. What you are looking for is deep golden-brown color, bubbled skin with a cratered texture, and an internal temperature of 190°F / 88°C when measured in the thickest part of the drumette. At this temperature, the collagen in the skin has fully broken down and the fat has rendered completely — this is what produces that perfect crack when you bite down.
Step 5 — Toss in Buffalo Sauce (Optional)
If you are making classic buffalo wings, melt the Kerrygold butter in a microwave-safe bowl and whisk in the Frank’s RedHot until fully emulsified. The mixture should be smooth and glossy.
Transfer the cooked wings to a large mixing bowl, pour the buffalo sauce over the top, and toss gently until every wing is evenly coated. The heat from the wings will keep the sauce warm and help it cling to every surface.
Plate immediately, garnish with fresh chopped parsley, and serve with celery sticks and blue cheese dressing if desired.

Air Fryer Crispy Chicken Wings (The Baking Soda Method)
Ingredients
Equipment
Method
- Pat chicken wings completely dry with paper towels. Lay them out on a wire rack set over a sheet pan.
- Sprinkle baking soda evenly over all wings. Toss and massage with hands to coat every piece. Surface will become slightly tacky.
- Place rack uncovered in refrigerator for minimum 30 minutes, ideally 2 to 4 hours.
- Remove wings from fridge and let sit at room temperature for 15 to 20 minutes.
- Preheat air fryer to 400°F (204°C) for 5 minutes.
- In a large mixing bowl, combine kosher salt, garlic powder, smoked paprika, and cracked black pepper. Add wings and drizzle with avocado oil. Toss until evenly coated.
- Arrange wings in air fryer basket in a single layer with small gaps between each piece. Do not overcrowd.
- Air fry at 400°F (204°C) for 12 minutes without opening the basket.
- Open basket and flip each wing using tongs.
- Cook for an additional 10 to 12 minutes until wings reach 190°F (88°C) internal temperature and skin is deep golden-brown with bubbled, cratered texture.
- For buffalo wings: Melt butter in a microwave-safe bowl and whisk in Frank’s RedHot until smooth. Transfer cooked wings to a large bowl, pour sauce over, and toss to coat.
- Plate immediately, garnish with fresh parsley, and serve with celery sticks and blue cheese dressing if desired.
💬 Chef Hamid’s Insight
I have made wings a hundred different ways. I have fried them in cast iron. I have roasted them on sheet pans. I have grilled them over charcoal and smoked them low and slow. But the sound of crunch when you bite into a properly executed air fryer wing using the baking soda method — that sound is what keeps me coming back.
Wings are the ultimate social food. Nobody eats them alone in silence. They are passed around, fought over, debated. Flats versus drums. Sauce versus dry rub. Ranch versus blue cheese. The meal itself becomes the conversation.
What the baking soda method gives you is not just texture — it is confidence. You know the wings will be crispy. You stop worrying and start enjoying. That shift changes the entire experience.
Great wings are not about the recipe. They are about the gathering that happens around them.
— Chef Hamid | Homely Recipe
🥗 Nutrition Information
Per serving — based on 6 servings. Values are estimates and include buffalo sauce.
| Nutrient | Amount Per Serving |
|---|---|
| Calories | 420 kcal |
| Protein | 28g |
| Total Fat | 32g |
| Saturated Fat | 12g |
| Carbohydrates | 3g |
| Sodium | 980mg |
| Cholesterol | 135mg |
🌡️ Food Safety Temperature Guide
| Stage | Temperature | Notes |
|---|---|---|
| USDA Minimum (Poultry) | 165°F / 74°C | Safe to eat, but skin will not be fully rendered |
| Recommended for Wings | 190°F / 88°C | Collagen breaks down; skin crisps fully; fat renders completely |
| Air Fryer Cooking Temp | 400°F / 204°C | Optimal for Maillard Reaction and rapid moisture evaporation |
| Danger Zone | 40–140°F / 4–60°C | Do not hold cooked wings in this range over 2 hours |
| Reheating Minimum | 165°F / 74°C | Reheat to this internal temp to ensure food safety |
❄️ Storage & Reheating Guide
| State | Refrigerator | Freezer | Best Reheat Method |
|---|---|---|---|
| Cooked wings (unsauced) | Up to 4 days | Up to 3 months | Air fryer 375°F / 190°C for 5–6 min |
| Cooked wings (with sauce) | Up to 3 days | Not recommended | Oven 400°F / 204°C for 8–10 min on wire rack |
| Raw wings (with baking soda) | Cook within 24 hours | Not recommended | Do not freeze after baking soda treatment |
| Raw wings (untreated) | Up to 2 days | Up to 9 months | Thaw overnight in fridge before treating |
❓ FAQ
Does the baking soda make the wings taste different?
Not if you use the correct amount. One teaspoon per three pounds is the sweet spot — enough to change the texture without leaving any soapy or metallic aftertaste. Rinse the wings before seasoning if you are concerned, though I have never found it necessary.
Can I use baking powder instead of baking soda?
Baking powder contains baking soda plus an acid, and it will work — but you need to use roughly double the amount because the concentration of sodium bicarbonate is lower. I prefer pure baking soda for more predictable results.
Why do my wings still come out rubbery even with baking soda?
Two common reasons: you skipped the resting period, or you overcrowded the basket. Baking soda needs at least thirty minutes to raise the pH, and the wings need space for air to circulate. Cook in batches if necessary.
Can I cook frozen wings this way?
Thaw them completely first. Frozen wings release too much moisture during cooking, which overwhelms the crisping process. Thaw overnight in the refrigerator, pat dry, then proceed with the baking soda treatment.
What is the best dipping sauce for these wings?
Classic blue cheese dressing is my preference — the cool, tangy richness balances the heat and salt perfectly. But ranch, honey mustard, or even a side of extra buffalo sauce all work beautifully.
🔗 More From Homely Recipe
These articles pair perfectly with what you just learned:
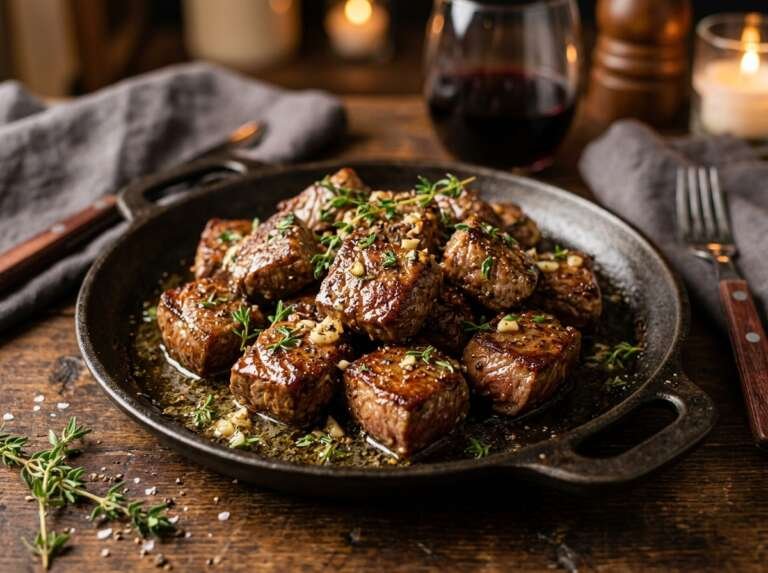
🥩 [Air Fryer Garlic Butter Steak Bites] — Combine these crispy wings with buttery steak bites for the ultimate Meat Lover’s Platter.
🥔 [Air Fryer Crispy Smashed Potatoes] — The perfect starchy side to balance the richness of buffalo wings.