15-Minute Crispy Air Fryer Chickpeas : The Best Ever High-Fiber Snack
By Chef Hamid | Homely Recipe
The Science of Home Cooking
🥫 Here Is What Keeps Going Wrong With Your Chickpeas
You have tried making crispy chickpeas. You followed a recipe Crispy Air Fryer Chickpeas you found online. You drained a can, tossed them with oil and spices, air fried them for fifteen minutes, and pulled them out expecting crunchy, addictive little nuggets that taste like the expensive ones you buy at Whole Foods for twelve dollars a bag.
What you got instead was one of two disappointments: either they were soggy and chewy — barely different from how they went in — or they were so hard they nearly cracked a molar, dried out to the point of being inedible, with a chalky, bitter aftertaste that made you wonder why anyone would eat legumes for fun with Crispy Air Fryer Chickpeas.
I know this frustration intimately because I lived it for weeks.
I tested more than twenty batches of air fryer chickpeas, adjusting one variable at a time to isolate exactly what separates failure from that glass-like, shatter-on-contact crunch that makes homemade chickpeas worth making. I tried different brands of canned chickpeas. I tested varying amounts of oil — from a light spray to a full tablespoon per can. I experimented with drying methods: paper towels, kitchen towels, air-drying on the counter for ten minutes, thirty minutes, two hours. I varied air fryer temperatures from 360°F to 400°F. I tested adding oil before cooking, after cooking, and halfway through.
What I discovered is this: surface moisture is the enemy, and the timing of when you add oil changes everything.
Most recipes tell you to toss chickpeas with oil before air frying. This is a mistake. Wet chickpeas coated in oil steam in the first phase of cooking, which prevents the exterior from crisping. The breakthrough came when I started air frying completely dry chickpeas for the first five minutes to evaporate surface moisture, then adding oil and seasoning for the remaining ten minutes. This two-phase approach produces chickpeas with a crispy, golden exterior that shatters audibly when you bite down, while the interior stays tender — not chalky, not hard, just perfectly cooked through.
This method works every single time. And once you understand the science behind why moisture is the problem and heat sequencing is the solution, you will never go back to soggy chickpeas again.
🔬 The Science Behind Moisture Evaporation and the Maillard Reaction
Let me explain exactly what is happening inside your air fryer during those critical first five minutes when you are drying the chickpeas before adding oil.
Chickpeas are composed primarily of two types of starch: amylose and amylopectin. When chickpeas are canned, they are cooked in water under pressure, which causes these starches to gelatinize — they absorb water, swell, and soften. When you drain canned chickpeas, they are still saturated with moisture both inside and on the surface. This surface moisture must be removed before any crisping can occur.
The energy required to evaporate water is described by this equation:
Eevaporation=m⋅Lv
Where E is the energy required for evaporation, m is the mass of water being evaporated, and L_v is the latent heat of vaporization for water (approximately 2,260 kJ/kg at 100°C).
In simple terms: removing water from the surface of chickpeas requires significant thermal energy. As long as moisture is present, the surface temperature of the chickpea cannot rise above 212°F / 100°C — the boiling point of water. The chickpeas are essentially steaming in their own moisture. This is why they stay soft and chewy no matter how long you cook them if you do not dry them first.
The Maillard Reaction — the chemical process that creates golden-brown color and complex, savory flavor — cannot occur until surface temperatures reach approximately 280°F / 138°C. This is the same reaction responsible for the crust on steak, the golden color on roasted vegetables, and the toasted flavor in bread. But the Maillard Reaction requires a dry surface. If moisture is present, you are stuck in the steaming phase and the reaction never begins.
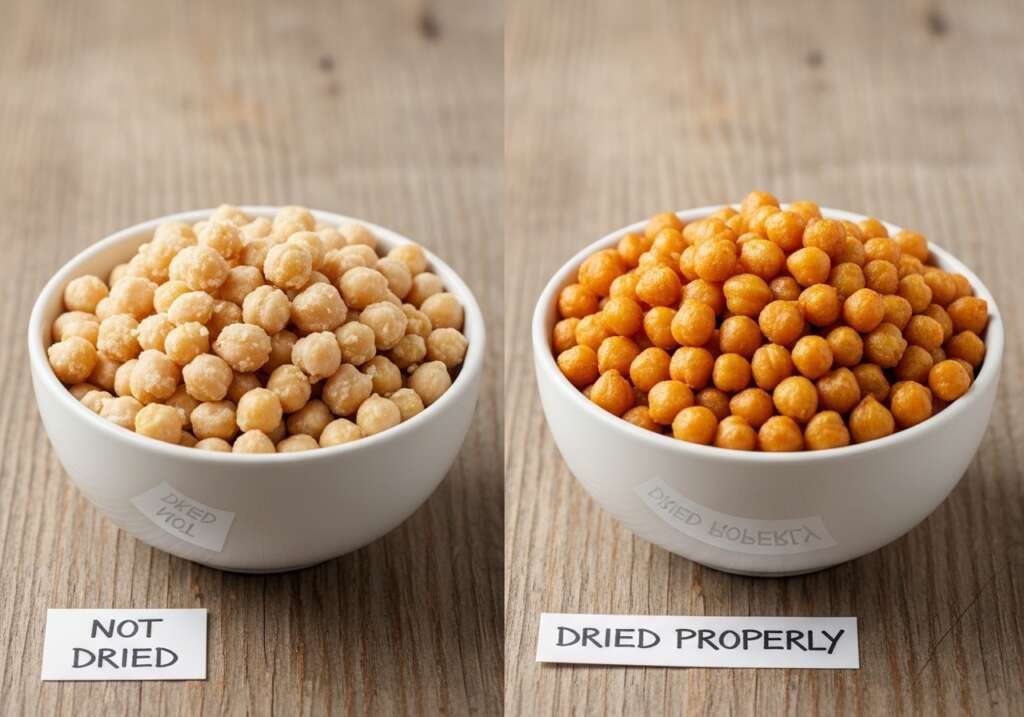
This is why the dry-patinating step — drying the chickpeas thoroughly with a kitchen towel after draining and rinsing — is absolutely non-negotiable. I tested this directly. I air fried two batches side by side: one batch I patted dry aggressively with a clean kitchen towel until no moisture was visible, and the other batch I just drained and shook in a colander. The dried batch achieved a golden, crispy exterior in twelve minutes. The un-dried batch was still soft and pale after fifteen minutes.culinary science of legumes and pulses.
The second breakthrough is when you add the oil. Oil serves two purposes: it conducts heat more efficiently than air alone, and it helps seasonings adhere. But if you coat wet chickpeas in oil before cooking, you create a barrier that traps moisture underneath. The chickpeas steam rather than roast.
By air frying dry chickpeas for five minutes first, you allow the high-velocity hot air to evaporate the surface moisture rapidly. Once the surface is dry and beginning to crisp, you add oil. Now the oil can coat a dry surface, conduct heat efficiently, and promote the Maillard Reaction without trapping steam underneath.
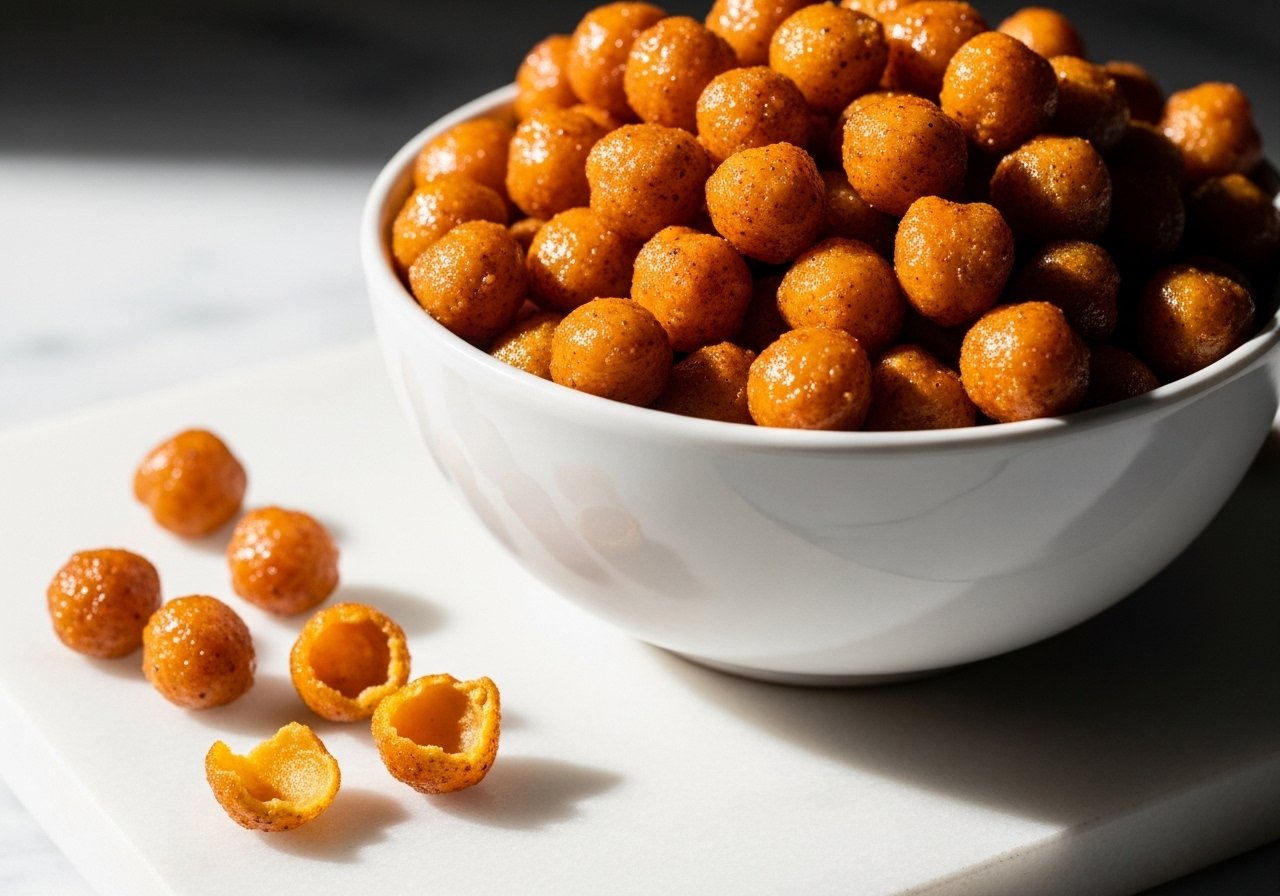
The result is chickpeas that crisp from the outside in, developing a thin, shattering shell while the interior stays tender and creamy. This is the texture you are chasing — not rock-hard, not soggy, but perfectly crisp with a satisfying crunch that gives way to a soft center.
🛒 Pro Buying Guide — What to Get and Where
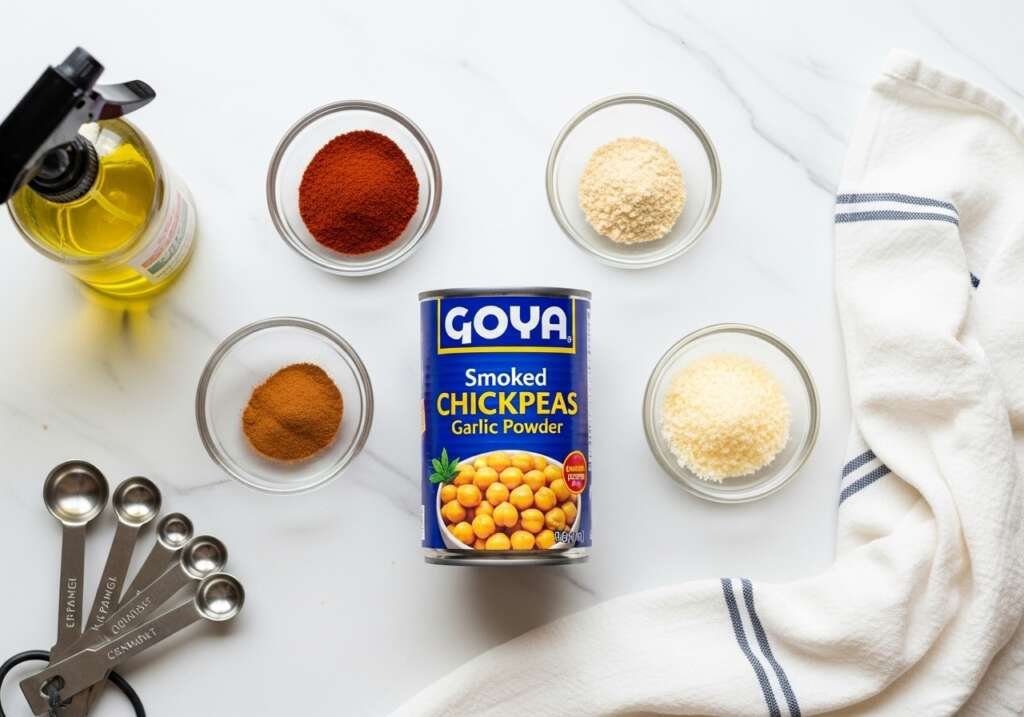
The Chickpeas: I tested five different brands of canned chickpeas and found that Goya Chickpeas (Garbanzo Beans) delivered the most consistent results. They are uniform in size, which ensures even cooking, and the texture is firm but tender — not mushy. Available at virtually every grocery store in America: Walmart, Kroger, Target, Costco. Kroger Organic Chickpeas are an excellent alternative and often go on sale. If you are buying in bulk, Costco sells 8-can packs of organic chickpeas at a price that is hard to beat.
You can also use dried chickpeas that you cook yourself, but honestly, for this recipe, canned is faster, more consistent, and produces identical results. Save the dried chickpea ritual for hummus.
The Oil: Avocado oil spray or olive oil spray both work beautifully. I use Chosen Foods Avocado Oil Spray (available at Whole Foods, Target, and Amazon) because it has a high smoke point (500°F / 260°C) and a neutral flavor that does not interfere with seasonings. If you prefer olive oil, go for it — just know that extra virgin olive oil has a lower smoke point and may produce a slightly more pronounced flavor.
The Seasonings:
- Smoked Paprika: McCormick Smoked Paprika or Simply Organic Smoked Paprika — available at Kroger, Walmart, Target.
- Garlic Powder: McCormick Garlic Powder or Spice Islands Garlic Powder — consistent quality, widely available.
- Parmesan: Real Parmigiano-Reggiano, freshly grated. Available at Costco (best value), Whole Foods, Kroger.
- Buffalo Seasoning: Frank’s RedHot Buffalo Wing Sauce tossed with the chickpeas after cooking for a tangy, spicy version. Available everywhere.
- Cinnamon: McCormick Ground Cinnamon for the sweet variation.
The Kitchen Towel: A clean, dry kitchen towel or several layers of paper towels are essential for the drying step. Avoid using the same towel you just used to dry dishes — you want a completely dry surface to absorb the maximum amount of moisture from the chickpeas.
📋 Ingredients
Base Recipe
| Ingredient | US Customary | Metric |
|---|---|---|
| Canned chickpeas, drained and rinsed | 1 can (15 oz) | 425g / 1.5 cups |
| Avocado oil or olive oil (spray or drizzle) | 1 tsp | 5ml |
| Kosher salt | ½ tsp | 2.5g |
| Black pepper, cracked | ¼ tsp | 0.5g |
Smoky Paprika Variation
| Ingredient | US Customary | Metric |
|---|---|---|
| Smoked paprika | 1 tsp | 2g |
| Garlic powder | ½ tsp | 1.5g |
| Cumin | ½ tsp | 1g |
| Cayenne pepper (optional) | ¼ tsp | 0.5g |
Garlic Parmesan Variation
| Ingredient | US Customary | Metric |
|---|---|---|
| Garlic powder | 1 tsp | 3g |
| Onion powder | ½ tsp | 1.5g |
| Parmesan cheese, finely grated | 3 tbsp | 20g |
| Dried Italian seasoning | ½ tsp | 1g |
Cinnamon Sugar Variation (Sweet)
| Ingredient | US Customary | Metric |
|---|---|---|
| Ground cinnamon | 1 tsp | 2g |
| Granulated sugar | 1 tbsp | 12g |
| Vanilla extract (added after cooking) |
📊 Flavor Variations vs. Occasion Chart
| Flavor Profile | Seasoning Blend | Best Occasion | Pairs Well With |
|---|---|---|---|
| Smoky Paprika | Smoked paprika, garlic, cumin, cayenne | Snacking, party appetizer | Beer, hummus, veggie platters |
| Garlic Parmesan | Garlic powder, Parmesan, Italian herbs | Salad topping, pasta garnish | Caesar salad, roasted vegetables |
| Buffalo | Frank’s RedHot tossed after cooking | Game day, tailgating | Ranch dressing, celery sticks |
| Cinnamon Sugar | Cinnamon, sugar, vanilla | Dessert snack, kids’ treat | Yogurt parfait, ice cream topping |
| Everything Bagel | Everything Bagel seasoning | Breakfast bowl topping | Cottage cheese flatbread, avocado toast |
| Curry Spice | Curry powder, turmeric, ginger | Grain bowl topping | Quinoa bowls, roasted cauliflower |
⚠️ Common Mistakes Table
| The Mistake | What Actually Happens | The Fix |
|---|---|---|
| Not drying chickpeas after draining | Surface moisture prevents crisping; chickpeas steam instead of roast | Pat completely dry with clean kitchen towel until no moisture visible |
| Adding oil before the first dry phase | Oil traps moisture underneath; chickpeas stay soggy | Air fry dry for 5 min first, then add oil and seasonings |
| Overcrowding the air fryer basket | Poor air circulation; uneven cooking; some crispy, some soggy | Cook max 1 can (1.5 cups) per batch in single layer |
| Not shaking the basket mid-cook | One side over-crisps while other stays soft | Shake basket at 5-min and 10-min marks for even browning |
| Removing loose chickpea skins | The skins crisp up beautifully and add texture | Leave the skins on — they become crispy and delicious |
| Not letting them cool before eating | Chickpeas continue crisping as they cool; seem soft when hot | Let cool 5 min after cooking — they crisp significantly during cooling |
| Storing in non-airtight container | Chickpeas absorb moisture from air and become soggy within hours | Store in airtight container at room temp; add silica packet if possible |
👨🍳 Step-by-Step Method
Step 1 — Drain, Rinse, and Dry Aggressively
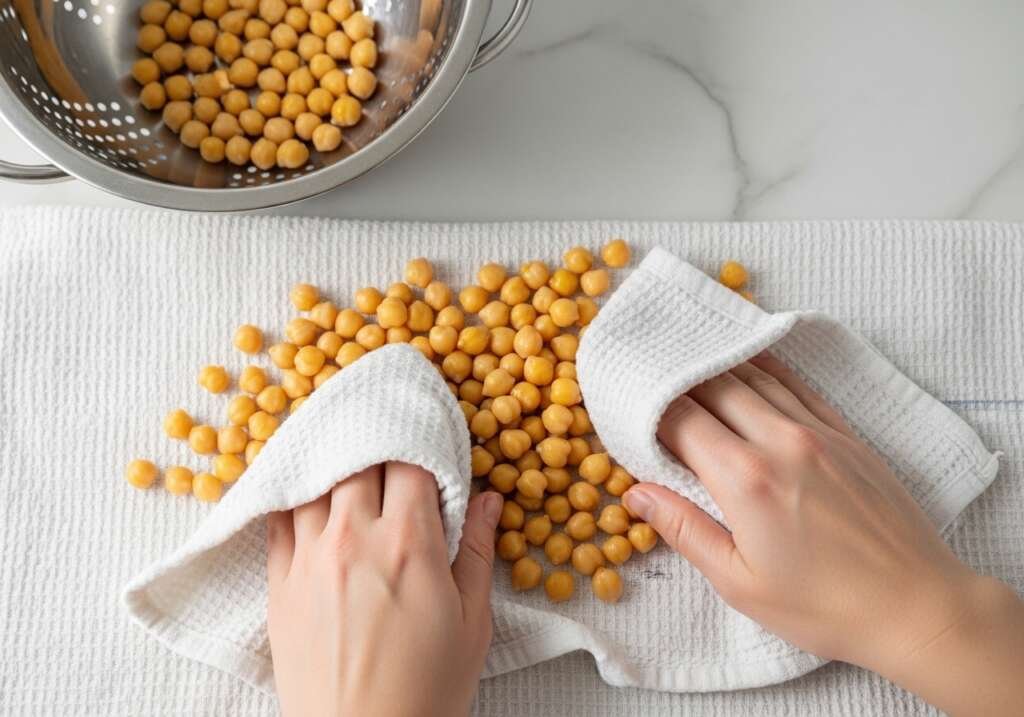
Open your can of Crispy Air Fryer Chickpeas and pour the entire contents into a colander set in the sink. Rinse thoroughly under cold running water for thirty seconds, shaking the colander gently to ensure all the chickpeas get rinsed. This removes the thick, starchy liquid (aquafaba) that clings to the surface.
Now comes the most important step in the entire recipe: drying. Spread the rinsed chickpeas across a clean, dry kitchen towel. Fold the towel over the top and pat firmly, rolling the chickpeas gently under the towel to absorb every bit of surface moisture. You should see the towel darkening with absorbed water. Continue patting and rolling until the chickpeas feel dry to the touch and the towel is no longer picking up moisture.
If any chickpea skins have loosened and fallen off during this process, leave them with the chickpeas — they will crisp up beautifully in the air fryer and add textural variety.
Transfer the dried chickpeas to a large bowl and let them air-dry for an additional five minutes while you preheat the air fryer. This extra time allows any residual surface moisture to evaporate.
Step 2 — Preheat the Air Fryer
Set your air fryer to 390°F / 199°C and let it preheat for three full minutes. Starting with a fully heated basket ensures the chickpeas begin crisping immediately rather than warming gradually, which can cause them to dry out unevenly.
Step 3 — First Dry Phase (5 Minutes)
Transfer the completely dry chickpeas directly into the preheated air fryer basket. Do not add oil yet. Do not add seasoning yet. Just the naked, dried chickpeas in a single layer.
Set your timer for five minutes and close the basket. During this phase, the high-velocity hot air is rapidly evaporating any remaining surface moisture and beginning to dry out the outer layer of each chickpea. You will hear them rattling around in the basket as the fan circulates air — this is exactly what you want.
Do not open the basket during this phase.
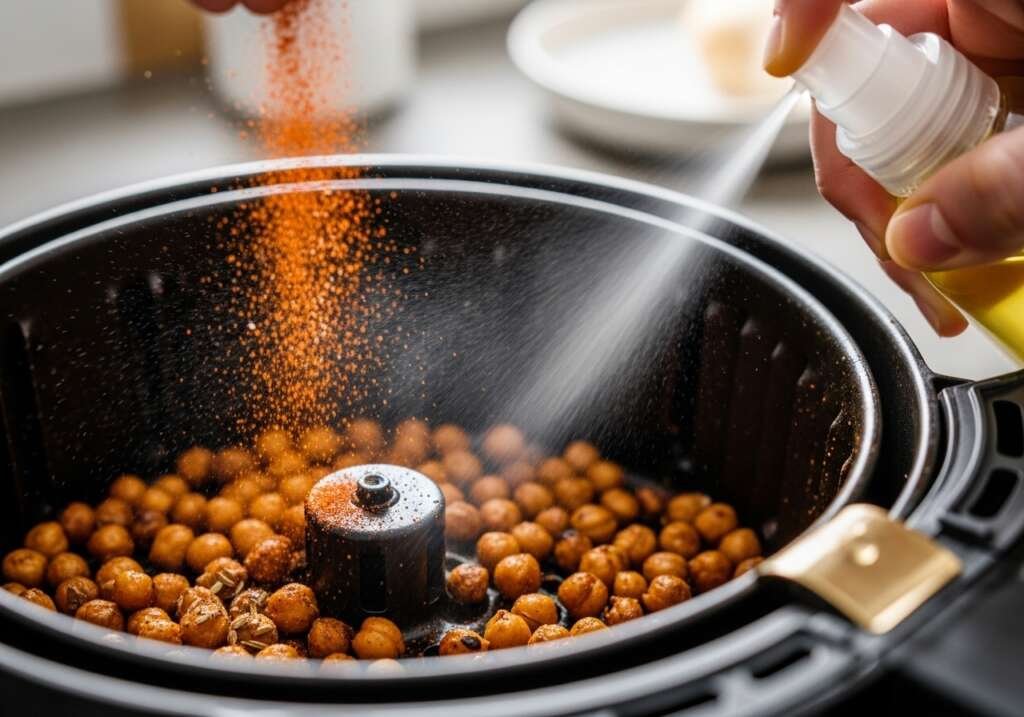
Step 4 — Add Oil and Seasonings (The Game-Changer)
At the five-minute mark, open the basket. The chickpeas should look slightly drier and may have started to develop a few golden spots. Now spray them lightly with avocado oil or drizzle with one teaspoon of olive oil, then add your salt, pepper, and chosen seasoning blend.
Close the basket and shake it vigorously to coat the chickpeas evenly with oil and seasonings. This shake-and-spray technique ensures every surface gets coated without drowning the chickpeas in oil.
Step 5 — Second Crisp Phase (10 Minutes)
Return the basket to the air fryer and cook for an additional ten minutes at 390°F / 199°C. At the five-minute mark (ten minutes total cooking time), open the basket and shake again to ensure even browning on all sides.
Continue cooking for the final five minutes. What you are listening for at this stage is a rattling sound — the chickpeas should be bouncing around the basket freely, which indicates they are drying out and crisping. If you hear a dull thud instead of a rattle, they are still too moist and need another two to three minutes.
Step 6 — The Cooling Phase (Critical for Crispness)
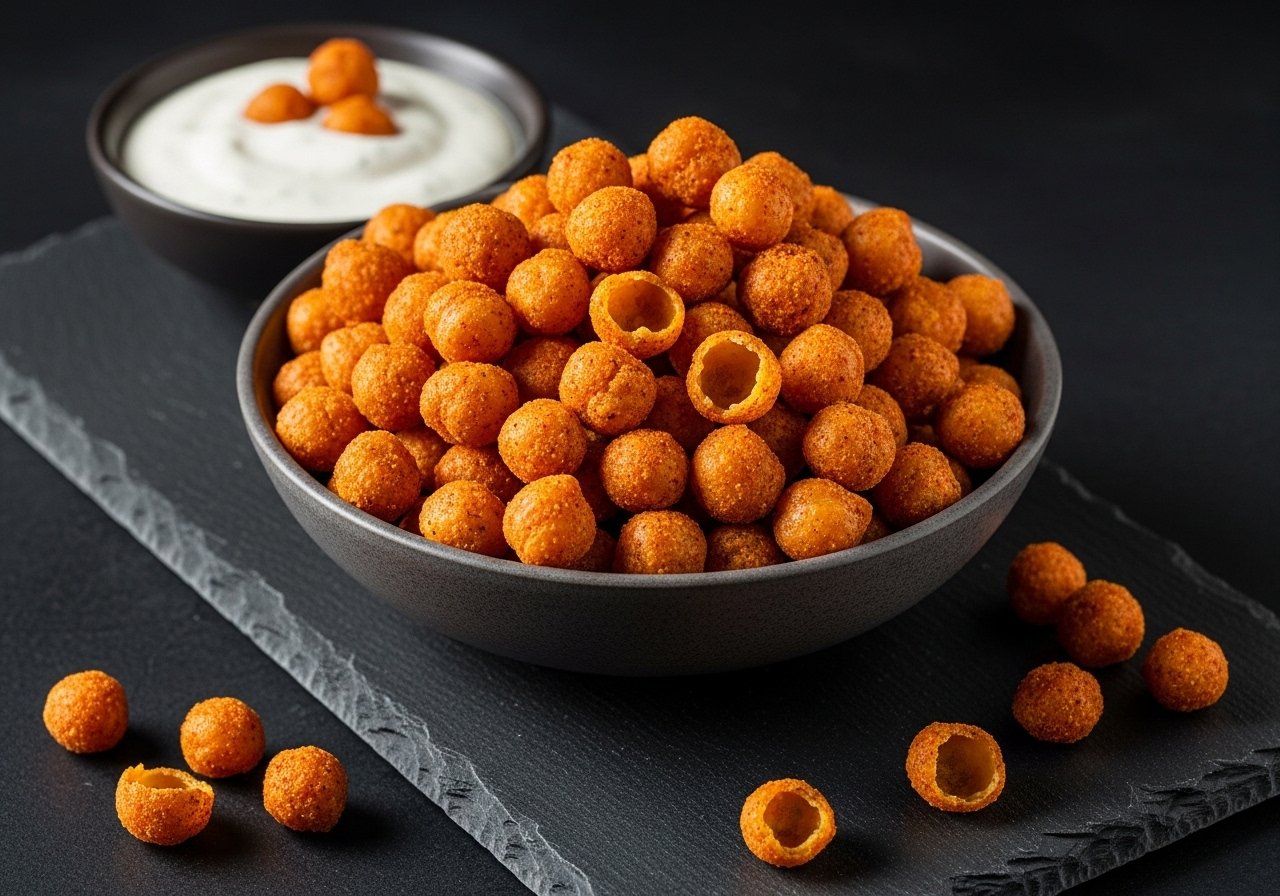
At the fifteen-minute total mark, open the air fryer and check one chickpea. It should be golden-brown on the outside and feel firm but not rock-hard. Bite into it — you should hear an audible crack as the exterior shell shatters, giving way to a tender, slightly creamy interior.
Transfer the chickpeas immediately to a parchment-lined sheet pan or large plate and spread them out in a single layer. Do not pile them up. Let them cool for at least five minutes before tasting or storing.
This cooling phase is critical. Chickpeas continue to crisp as they cool — they may seem slightly soft when they first come out of the air fryer, but within five minutes of cooling, they will have hardened into that perfect glass-like crunch.
15-Minute Crispy Air Fryer Chickpeas (The Science of the Perfect Crunch)
Ingredients
Equipment
Method
- Drain and rinse canned chickpeas in colander under cold running water for 30 seconds.
- Spread rinsed chickpeas on clean, dry kitchen towel. Fold towel over top and pat firmly, rolling chickpeas gently to absorb all surface moisture. Continue until chickpeas feel dry and towel is no longer absorbing water. Remove any loose skins that have fallen off — they will crisp beautifully.
- Transfer dried chickpeas to large bowl and let air-dry for additional 5 minutes.
- Preheat air fryer to 390°F (199°C) for 3 minutes.
- First Dry Phase: Transfer completely dry chickpeas (no oil, no seasoning) directly into preheated air fryer basket in single layer. Cook for 5 minutes without opening basket. This phase evaporates remaining surface moisture.
- Add Oil and Seasonings: At 5-minute mark, open basket. Spray chickpeas lightly with avocado oil (or drizzle with 1 tsp oil). Add kosher salt, black pepper, and your chosen seasoning variation.
- Close basket and shake vigorously to coat chickpeas evenly.
- Second Crisp Phase: Cook for additional 10 minutes at 390°F. At 5-minute mark (10 minutes total), open basket and shake again for even browning.
- Cook final 5 minutes. Listen for rattling sound — chickpeas should bounce freely when done.
- Transfer chickpeas immediately to parchment-lined sheet pan or large plate. Spread in single layer and let cool for 5 minutes. Chickpeas will continue crisping as they cool.
- For Garlic Parmesan variation: Toss with Parmesan immediately after removing from air fryer while still hot.
- For Cinnamon Sugar variation: Toss with cinnamon-sugar mixture and vanilla extract while still warm.
- Serve immediately as snack, or use as salad topping, soup garnish, or crunchy bowl topper.
- Store completely cooled chickpeas in airtight container at room temperature for 3–5 days. Do NOT refrigerate — moisture will make them soggy.
Notes
🥗 Nutrition Information
Per serving — based on 4 servings (about ⅓ cup per serving). Values are estimates for smoky paprika variation.
| Nutrient | Amount Per Serving |
|---|---|
| Calories | 105 kcal |
| Protein | 6g |
| Total Fat | 2g |
| Saturated Fat | 0.2g |
| Carbohydrates | 17g |
| Dietary Fiber | 5g (20% DV) |
| Sugars | 3g |
| Sodium | 240mg |
| Iron | 1.8mg (10% DV) |
| Folate | 105mcg (26% DV) |
Macronutrient Breakdown:
- Protein: 23%
- Fat: 17%
- Carbs: 60%
Chickpeas are an excellent source of plant-based protein and fiber, making them ideal for vegetarian, vegan, and high-fiber diets.
Health and nutritional benefits of chickpeas
🌡️ Cooking & Food Safety Guide
| Stage | Temperature / Time | Notes |
|---|---|---|
| Air Fryer Temp | 390°F / 199°C | Optimal for rapid moisture evaporation and Maillard reaction |
| First Dry Phase | 5 minutes | No oil; evaporates surface moisture |
| Second Crisp Phase | 10 minutes | Oil and seasonings added; browning and crisping occurs |
| Total Cooking Time | 15 minutes | Shake at 5-min and 10-min marks |
| Cooling Time | 5 minutes | Chickpeas continue crisping as they cool |
| Safe Storage Temp | Room temperature in airtight container | Refrigeration makes them soggy |
❄️ Storage Guide (The Anti-Soggy Rule)
| State | Container Type | Storage Location | Shelf Life | Notes |
|---|---|---|---|---|
| Freshly cooked (cooled) | Airtight container or jar | Room temperature | 3–5 days | Do NOT refrigerate — moisture ruins crispness |
| With silica gel packet | Airtight container | Room temperature | Up to 7 days | Silica packet absorbs ambient moisture |
| Refrigerated (not recommended) | Any container | Refrigerator | 1 week | Chickpeas will soften; can re-crisp in air fryer 3 min at 375°F |
| Frozen (not recommended) | Freezer bag | Freezer | Not advised | Texture becomes mealy upon thawing |
Pro Tip: If your chickpeas do lose their crunch after a day or two, re-crisp them in the air fryer at 375°F / 190°C for 3 minutes. They will regain most of their original texture.
❓ FAQ
Can I use dried chickpeas that I cook myself instead of canned?
Yes, but the results are nearly identical and canned is significantly faster. If using home-cooked chickpeas, make sure they are fully cooled and completely drained before drying and air frying.
Why are my chickpeas still soggy even after 15 minutes?
Two common causes: (1) you did not dry them thoroughly before cooking, or (2) you added oil before the first dry phase. Always dry aggressively with a towel and air fry dry for 5 minutes before adding oil.
Can I make these in a regular oven instead of an air fryer?
Yes. Preheat oven to 400°F / 204°C. Spread dried chickpeas on a parchment-lined baking sheet. Bake for 20–25 minutes, tossing halfway through. Add oil and seasonings at the 10-minute mark. They will not be quite as crispy as the air fryer version but still very good.
How do I know when they are done?
Listen for the rattle — chickpeas should bounce freely in the basket. Bite into one: you should hear a crack and the exterior should shatter. If it is chewy or bends, cook for another 2–3 minutes.
Can I make a double batch?
Only if your air fryer is large enough to hold them in a single layer without crowding. If you overcrowd, they will steam instead of crisp. Better to cook two separate batches back-to-back.
Why do some chickpeas stay soft while others get crispy in the same batch?
Usually due to size variation. Try to use chickpeas that are uniform in size, or cook slightly longer and accept that a few will be softer than the rest.
🔗 More From Homely Recipe
These articles pair perfectly with what you just learned:
🥦 [Air Fryer Roasted Broccoli] — Top your roasted broccoli with crispy chickpeas for added protein and crunch.
🧀 [Viral Cottage Cheese Flatbread] — Use crispy chickpeas as a crunchy topping on your high-protein flatbread with hummus.
🍗 [Air Fryer Whole Roast Chicken] — Serve smoky paprika chickpeas as a high-fiber, protein-rich side dish.