
Air Fryer Whole Roast Chicken (The Rotisserie-Style Secret)
By Chef Hamid | Homely Recipe
The Science of Home Cooking
🍗 The Sunday Roast Challenge: Why Your Air Fryer Beats Your Oven
Let me ask you something. When was the last time you roasted a whole chicken in your conventional oven and pulled it out with skin so crispy it shattered under your knife, while the breast meat stayed so juicy it practically pooled on the cutting board?
If you are being honest, the answer is probably never — or at least, not consistently.
I have roasted hundreds of whole chickens over the years. In cast iron skillets. On sheet pans. In Dutch ovens. In convection ovens with the fan running. The results ranged from good to excellent, but they were never fast, and they were never foolproof. Oven roasting a chicken is a balancing act: hot enough to crisp the skin, gentle enough not to dry out the breast, long enough to render the thigh fat, quick enough that you are not standing in your kitchen for ninety minutes waiting for dinner with Air Fryer Whole Roast Chicken.
Then I started testing whole chickens in the air fryer, and everything I thought I knew about roasting poultry shifted.
Here is what makes the air fryer superior for this specific task. First, speed — a four-pound chicken roasts in forty-five to fifty minutes in an air fryer versus seventy-five to ninety minutes in a conventional oven. Second, skin texture — the high-velocity convection air produces a level of crispness that rivals a professional rotisserie without any special equipment or technique. Third, even heat distribution — the circulating air surrounds the chicken from every angle, eliminating the hot and cold spots that plague traditional ovens.
But here is the secret that took me weeks of testing to discover: you have to start the chicken breast-side down.
This goes against every instinct. We are trained to roast chickens breast-side up so the skin on the most visible part of the bird gets golden and beautiful. But that approach exposes the delicate white meat of the breast to direct overhead heat for the entire cooking time, which almost always results in dry, chalky texture by the time the thighs are done.
Flipping the script — literally — changes everything. When you start breast-side down, the dark meat (thighs and drumsticks) faces the heating element and renders perfectly while the breast is shielded. Halfway through, you flip the bird, and the skin crisps beautifully in the final phase without overcooking the interior.
This is not a gimmick. This is physics. And once you see how it works, you will never roast a whole chicken any other way.
🔬 The Science Behind Inversion Roasting and Thermal Mass
Let me explain exactly what is happening inside that air fryer basket when you roast a whole chicken using the breast-side-down method.
Thermal mass is the amount of heat energy required to change the temperature of an object. It depends on the object’s mass and its specific heat capacity — the amount of energy needed to raise one gram of that material by one degree Celsius. This relationship is expressed by the equation:
Q=m⋅cp⋅ΔT
Where Q is the heat energy, m is the mass, c_p is the specific heat capacity, and ΔT is the temperature change.
In simple terms: different parts of the chicken have different thermal masses. The breast meat is lean — mostly protein and water with minimal fat. It heats quickly and loses moisture rapidly under sustained high heat. The thighs and drumsticks, by contrast, are loaded with intramuscular fat and connective tissue. They have higher thermal mass and need more time and heat energy to break down the collagen and render the fat into that silky, fork-tender texture we associate with perfectly cooked dark meat.
When you roast a chicken breast-side up in a conventional oven, the heating element is above the bird. The breast gets blasted with direct radiant heat for the entire cooking time. By the time the thighs reach 175°F / 79°C — the temperature where collagen breaks down and dark meat becomes tender — the breast has been sitting at 165°F or higher for twenty minutes, and all the moisture has been driven out.
Inversion roasting solves this problem. By starting the chicken breast-side down, you position the high-thermal-mass dark meat (thighs and legs) closest to the heat source during the first half of cooking. These areas need the extra thermal energy to render fat and break down connective tissue. Meanwhile, the breast is facing away from the direct heat, warming gently from ambient convection and the heat radiating through the bird’s own body mass.
Halfway through cooking, you flip the chicken breast-side up. Now the breast faces the heat for the final phase — just long enough to crisp the skin and bring the internal temperature to 160–165°F / 71–74°C. The thighs, already well on their way to doneness from the first phase, coast to their target temperature of 175°F / 79°C using residual heat and the continued convection from below.
The air fryer’s high-velocity fan accelerates this entire process. Instead of relying purely on radiant heat from an oven element, the circulating air transfers thermal energy to every surface of the chicken simultaneously. This is forced convection, and it is significantly more efficient than the natural convection you get in a standard oven.
The result: a chicken with crispy, golden skin on every surface, breast meat that stays juicy and tender, and dark meat that has rendered completely without any rubbery texture or pockets of unrendered fat.

🛒 Pro Buying Guide — What to Get and Where
The Chicken: Costco’s Organic Whole Chickens are my first choice for this recipe. They come in packs of two, typically in the 4 to 4.5-pound range, which is the perfect size for most air fryers. The quality is consistently excellent, and the price per pound is hard to beat. Walmart and Kroger also carry reliable options — look for chickens labeled “air-chilled” if possible, as they retain less added water than water-chilled birds and produce crispier skin.
Size matters for air fryers. Your chicken needs to fit inside the basket with at least half an inch of clearance on all sides for proper air circulation. For most 5.8-quart air fryers, a 4-pound chicken is the maximum you can comfortably roast. If you have a 7-quart or larger model, you can go up to 5 pounds. Measure your basket before shopping.
The Butcher’s Twine: Trussing — tying the legs together — is essential for even cooking and preventing the wing tips from burning. Any 100% cotton kitchen twine works. Regency Wraps Cooking Twine is widely available at Walmart, Target, and Amazon. Do not use synthetic twine — it will melt.
The Digital Probe Thermometer: This is non-negotiable. You cannot judge doneness by time alone — chickens vary in size, air fryers vary in power, and guessing leads to either undercooked poultry or sawdust-dry breast meat. I recommend the ThermoPro TP19 or ThermoWorks ThermoPop — both are instant-read, accurate to ±1°F, and widely available at Amazon, Walmart, and Best Buy.
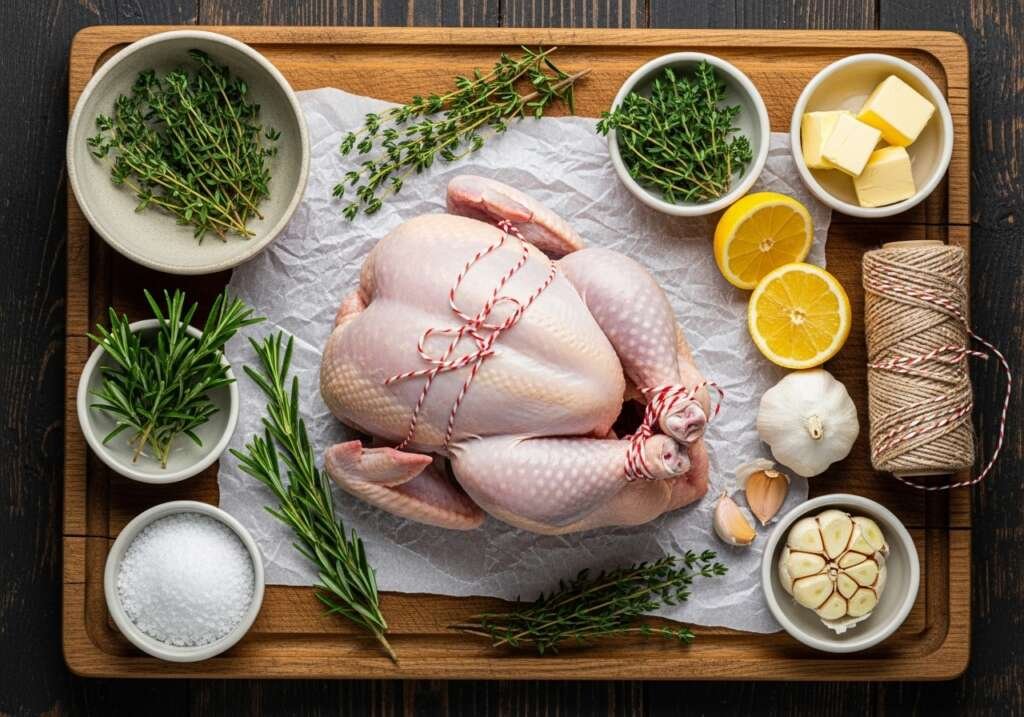
The Compound Butter: For the classic garlic-herb compound butter that goes under the skin, use Kerrygold Unsalted Butter — the higher fat content makes it easier to work with and creates a richer flavor. Fresh herbs are worth the investment here: rosemary, thyme, and parsley from Whole Foods, Kroger, or even Trader Joe’s.
The Dry Brine: All you need is Diamond Crystal Kosher Salt or Morton Kosher Salt and time. One tablespoon of salt per 4-pound chicken, applied 12 to 24 hours ahead, transforms the texture and flavor more than any marinade ever could.
📋 Ingredients
| Ingredient | US Customary | Metric |
|---|---|---|
| Whole chicken | 4 lbs | 1.8 kg |
| Kosher salt (dry brine) | 1 tbsp | 15g |
| Unsalted butter, softened | 4 tbsp | 56g |
| Fresh rosemary, minced | 1 tbsp | 4g |
| Fresh thyme, minced | 1 tbsp | 3g |
| Garlic cloves, minced | 4 cloves | 16g |
| Lemon zest | 1 tsp | 2g |
| Black pepper, cracked | 1 tsp | 2g |
| Smoked paprika | 1 tsp | 2g |
| Olive oil or avocado oil | 1 tbsp | 15ml |
| Fresh lemon, halved | 1 whole | 1 whole |
| Fresh parsley, chopped (garnish) | 2 tbsp | 8g |
📊 Weight vs. Timing Chart
| Chicken Weight | Breast-Side Down | Flip | Breast-Side Up | Total Time |
|---|---|---|---|---|
| 3 lbs / 1.4 kg | 18 min at 360°F / 182°C | Flip at 18 min | 18 min at 380°F / 193°C | ~36 min |
| 4 lbs / 1.8 kg | 22 min at 360°F / 182°C | Flip at 22 min | 22 min at 380°F / 193°C | ~44 min |
| 5 lbs / 2.3 kg | 26 min at 360°F / 182°C | Flip at 26 min | 26 min at 380°F / 193°C | ~52 min |
Note: Always verify with a meat thermometer. Breast should reach 160–165°F / 71–74°C, thighs should reach 175°F / 79°C.
⚠️ Common Mistakes Table
| The Mistake | What Actually Happens | The Fix |
|---|---|---|
| Skipping the dry brine | Chicken is bland and skin does not crisp properly | Salt the chicken 12–24 hours ahead; refrigerate uncovered |
| Not trussing the legs | Wings and legs cook unevenly; wing tips burn | Tie legs together with butcher’s twine before cooking |
| Cooking breast-side up the whole time | Breast dries out before thighs are done | Start breast-side down for first half; flip halfway |
| Using a chicken that is too large | Poor air circulation; uneven cooking; undercooked thighs | Use max 4 lbs for 5.8-qt air fryer; 5 lbs for 7-qt+ models |
| Not using a meat thermometer | Chicken is either undercooked (unsafe) or overcooked (dry) | Check breast (165°F) and thigh (175°F) with instant-read thermometer |
| Skipping the resting period | Juices run out onto cutting board; dry meat | Rest whole chicken 10 minutes before carving |
👨🍳 Step-by-Step Method
Step 1 — Dry Brine the Chicken (12–24 Hours Ahead)
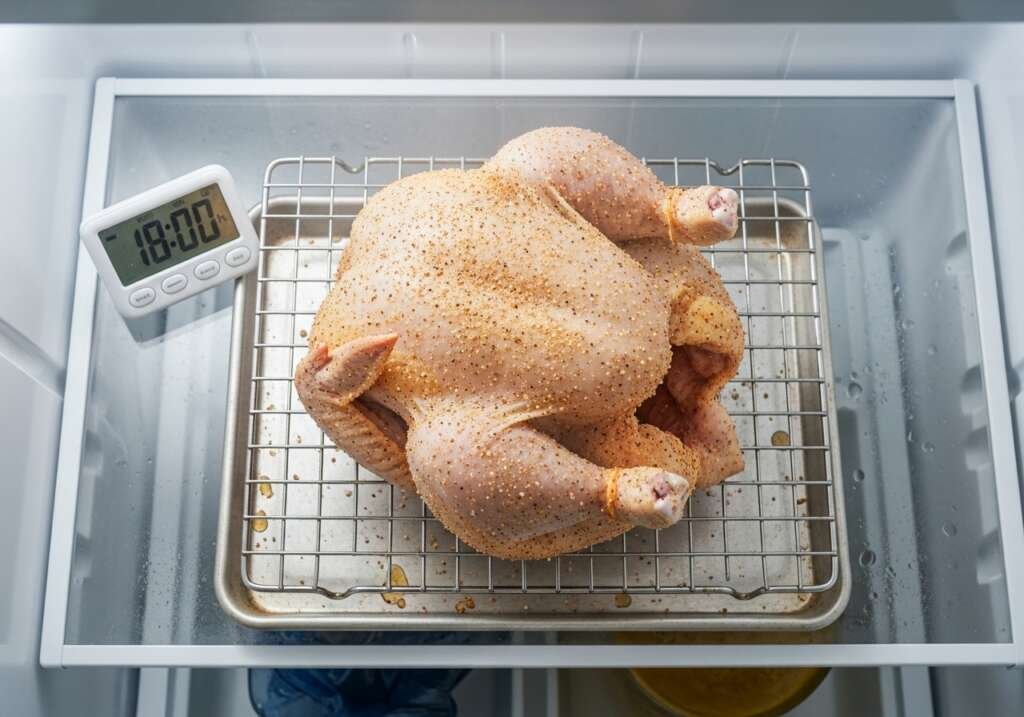
Remove your chicken from its packaging and pat it completely dry inside and out with paper towels. Moisture is the enemy of crispy skin, so take your time with this step.
Sprinkle one tablespoon of kosher salt evenly over the entire surface of the chicken — both sides, inside the cavity, and under the wings. Place the chicken on a wire rack set over a sheet pan, breast-side up, and refrigerate uncovered for at least twelve hours, ideally twenty-four.
This dry-brining period accomplishes two things. First, the salt penetrates the meat, seasoning it from the inside out and helping the proteins retain moisture during cooking. Second, the cold, dry air of the refrigerator evaporates surface moisture from the skin, which is critical for achieving that shatteringly crisp texture on Air Fryer Whole Roast Chicken
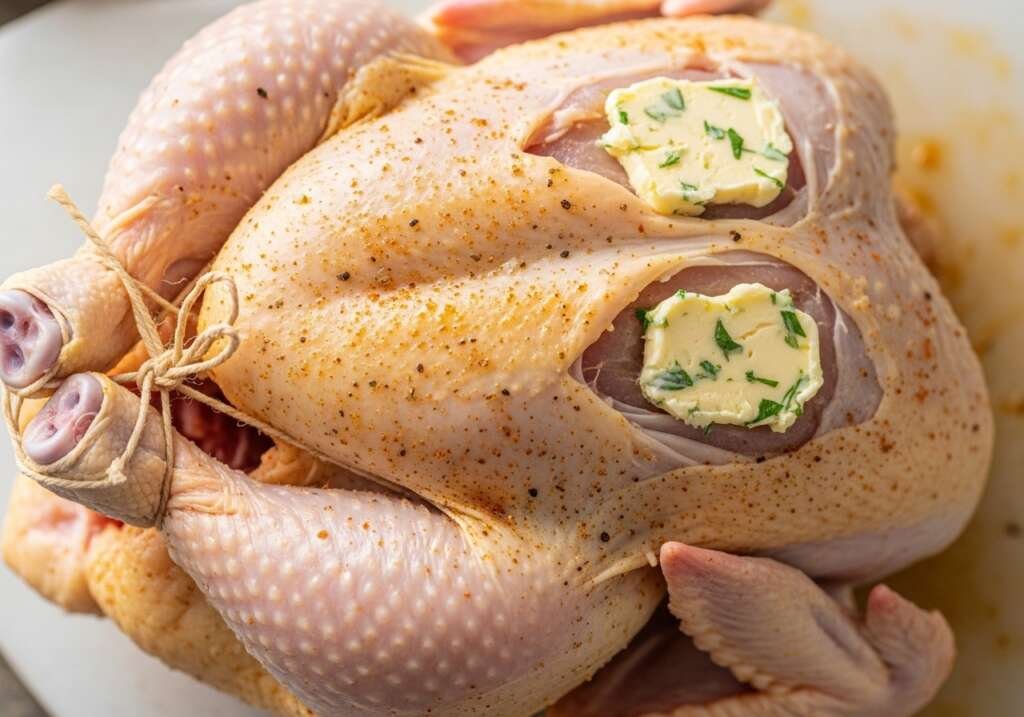
Step 2 — Make the Compound Butter
In a small bowl, combine the softened butter, minced rosemary, minced thyme, minced garlic, lemon zest, and half the black pepper. Mix with a fork until everything is evenly distributed and the butter is smooth and spreadable then Air Fryer Whole Roast Chicken.
This compound butter will go under the skin of the breast and thighs, where it will melt during cooking and baste the meat from within while adding layers of aromatic flavor.
Step 3 — Prep and Stuff the Chicken
Remove the Air Fryer Whole Roast Chicken from the refrigerator thirty minutes before cooking and let it come to room temperature. This ensures even cooking from the interior outward.
Using your fingers, gently loosen the skin over the breast and thighs, being careful not to tear it. Slide half of the compound butter under the skin on each side of the breast, and the remaining butter under the skin of the thighs. Massage the skin gently from the outside to distribute the butter evenly.
Stuff the cavity with the lemon halves — they will steam during cooking and infuse the meat with subtle citrus flavor while helping to keep the interior moist.
Step 4 — Truss the Chicken
Trussing — tying the legs together — serves two purposes. First, it creates a more compact shape that fits better in the air fryer basket and promotes even cooking. Second, it prevents the wing tips from sticking out and burning under the high heat.
Cut a 12-inch length of butcher’s twine. Cross the ends of the drumsticks and tie them together snugly. Tuck the wing tips behind the shoulders by bending them back under the bird — no twine needed, they will stay in place.
Rub the entire outside of the Air Fryer Whole Roast Chicken with olive oil and season with the remaining black pepper and smoked paprika. The oil helps the skin crisp and the spices adhere.
Step 5 — First Roast Phase (Breast-Side Down)
Preheat your air fryer to 360°F / 182°C for three minutes.
Place the chicken in the basket breast-side down — yes, you are placing it upside down with the backbone facing up. Set your timer based on the weight chart above. For a 4-pound chicken, cook for twenty-two minutes.
Do not open the basket during this phase. Let the convection heat do its work. The thighs and legs are facing the heating element and rendering their fat while the breast is protected below.
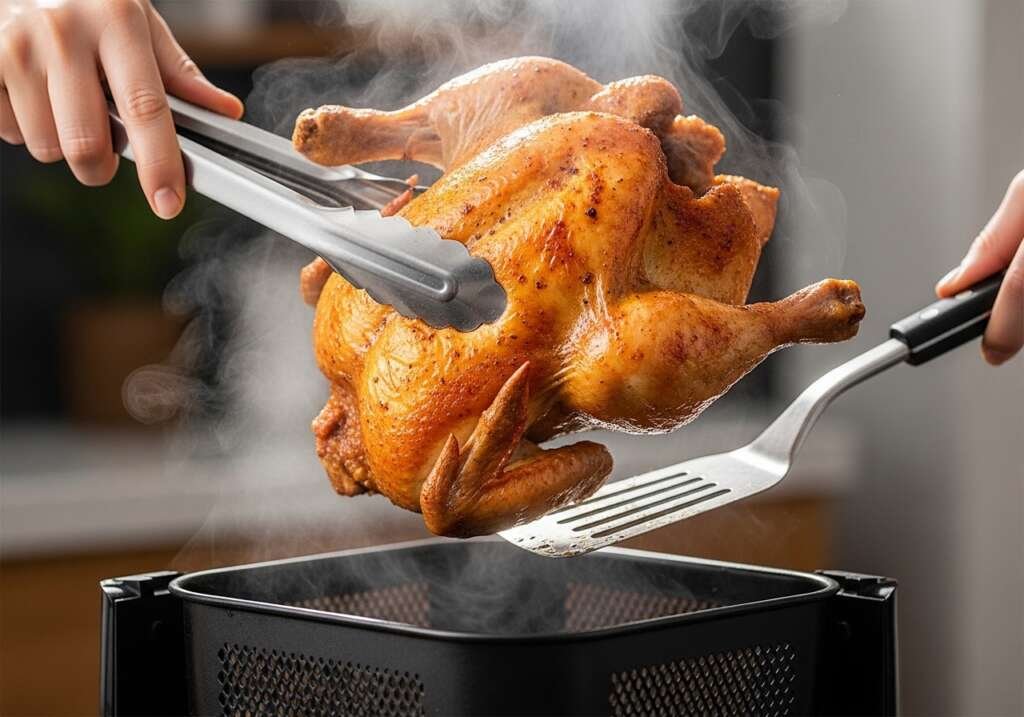
Step 6 — The Flip
When your timer goes off, carefully remove the basket. Using tongs and a sturdy spatula, flip the chicken so it is breast-side up. Be gentle — the skin is delicate and the chicken is hot.
Increase the air fryer temperature to 380°F / 193°C. This higher heat for the second phase promotes rapid skin crisping on the breast.
Return the basket to the air fryer and cook for another twenty-two minutes for a 4-pound bird.
Step 7 — Check Doneness and Rest
At the end of the second cooking phase, check the internal temperature of Air Fryer Whole Roast Chicken. Insert your instant-read thermometer into the thickest part of the breast (avoiding bone) — it should read 160–165°F / 71–74°C. Check the thickest part of the thigh as well — it should read 175°F / 79°C.
If the breast of Air Fryer Whole Roast Chicken is at temp but the thighs are not, return the chicken to the air fryer for another three to five minutes and check again.
Once both targets are hit, transfer the chicken to a cutting board and tent loosely with aluminum foil. Let it rest for ten minutes. This resting period allows the juices to redistribute throughout the meat. If you carve immediately, all that moisture will pour out onto the board and your meat will be dry.
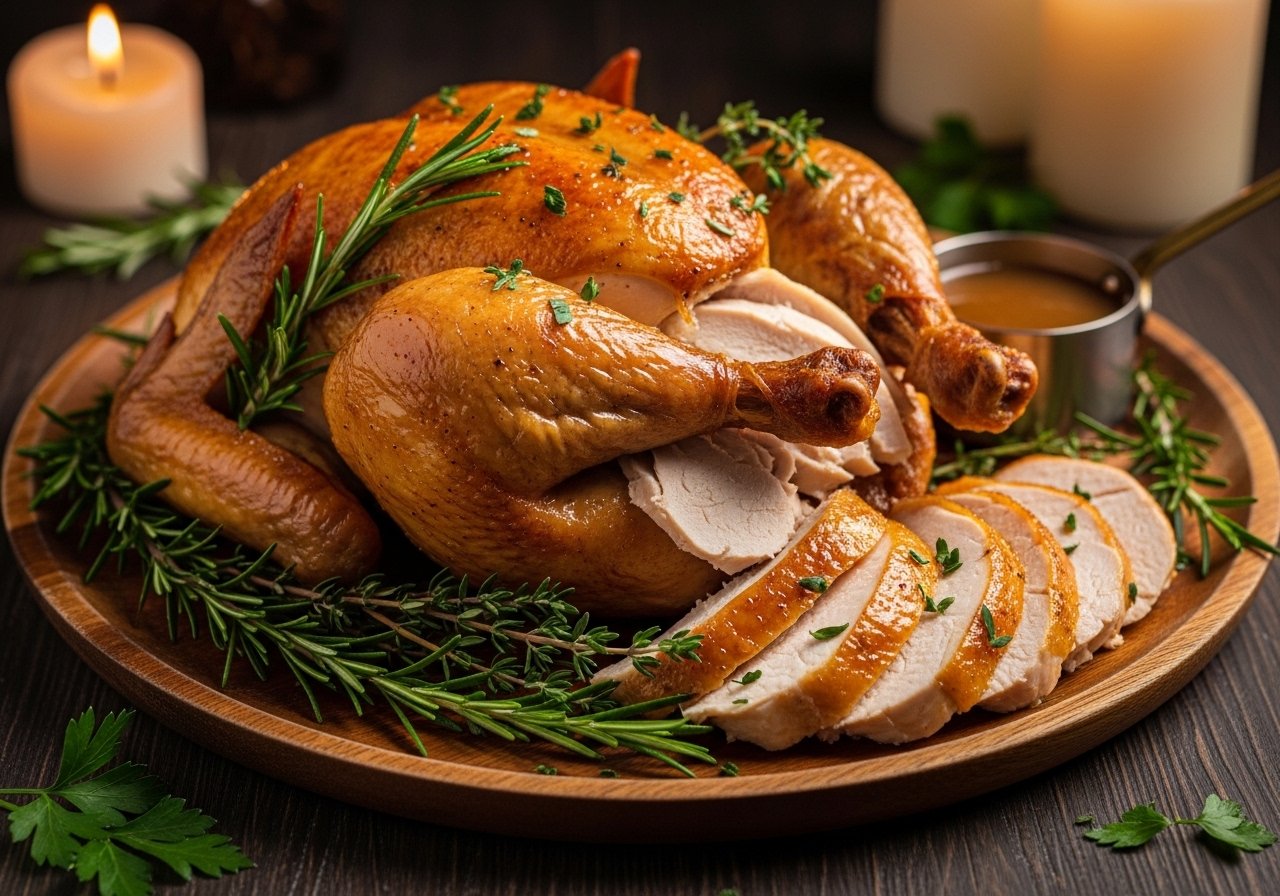
Step 8 — Carve and Serve
After resting, carve the chicken by first removing the legs (cut through the joint where the thigh meets the body), then removing the breasts in whole pieces by slicing along either side of the breastbone.
Slice the breast meat against the grain, arrange on a serving platter with the legs and thighs, and garnish with fresh chopped parsley.
The skin should shatter under your knife. The breast should be juicy and tender with no dry spots. The thighs should pull apart easily with a fork.
Air Fryer Whole Roast Chicken (The Rotisserie-Style Secret)
Ingredients
Equipment
Method
- Remove chicken from packaging. Pat completely dry inside and out with paper towels.
- Sprinkle 1 tablespoon kosher salt evenly over entire surface of chicken — both sides, inside cavity, and under wings.
- Place chicken on wire rack set over sheet pan, breast-side up. Refrigerate uncovered for 12 to 24 hours.
- Remove chicken from refrigerator 30 minutes before cooking. Let come to room temperature.
- Make compound butter: In a small bowl, combine softened butter, minced rosemary, thyme, garlic, lemon zest, and ½ tsp black pepper. Mix until smooth.
- Using fingers, gently loosen skin over breast and thighs without tearing. Slide half the compound butter under skin on each breast, and remaining butter under thigh skin. Massage skin from outside to distribute evenly.
- Stuff cavity with lemon halves.
- Truss chicken: Cut 12-inch length of butcher’s twine. Cross drumstick ends and tie together snugly. Tuck wing tips behind shoulders.
- Rub entire outside of chicken with olive oil. Season with smoked paprika and remaining black pepper.
- Preheat air fryer to 360°F (182°C) for 3 minutes.
- Place chicken in basket breast-side down (backbone facing up). Cook for 22 minutes without opening basket. (Adjust time based on weight: 3 lbs = 18 min, 5 lbs = 26 min)
- Carefully flip chicken breast-side up using tongs and spatula. Increase temperature to 380°F (193°C).
- Cook for additional 22 minutes. (Adjust based on weight: 3 lbs = 18 min, 5 lbs = 26 min)
- Check internal temperature: Breast should read 160–165°F (71–74°C), thighs should read 175°F (79°C). If not at temp, cook additional 3–5 minutes and check again.
- Transfer chicken to cutting board. Tent loosely with foil and rest for 10 minutes.
- Carve: Remove legs first by cutting through thigh joint. Remove breasts by slicing along either side of breastbone. Slice breast meat against the grain.
- Arrange on serving platter. Garnish with fresh chopped parsley. Serve immediately.
Notes
💬 Chef Hamid’s Insight
There is something deeply satisfying about pulling a Air Fryer Whole Roast Chicken from an air fryer basket that looks like it came off a professional rotisserie. The golden skin catches the light. The aroma fills the Air Fryer Whole Roast Chicken. You know, before you even cut into it, that you have done something right.
This is the dish that proves the air fryer is not just a gadget for reheating frozen food or making quick snacks. It is a legitimate cooking tool capable of producing restaurant-quality results with less time, less energy, and less cleanup than traditional methods.
The breast-side-down method is not intuitive. It requires you to trust the process even when it feels wrong. But that is what separates competent cooks from confident ones — the willingness to follow the science even when instinct pulls you in another direction.
Golden skin is not luck. It is technique, heat, and patience working together.
— Chef Hamid | Homely Recipe
🥗 Nutrition Information
Per serving — based on 6 servings (4 oz / 113g cooked Air Fryer Whole Roast Chicken per serving). Values are estimates and include skin.
| Nutrient | Amount Per Serving |
|---|---|
| Calories | 285 kcal |
| Protein | 32g |
| Total Fat | 16g |
| Saturated Fat | 5g |
| Carbohydrates | 1g |
| Sodium | 420mg |
| Cholesterol | 105mg |
| Iron | 1.2mg (7% DV) |
| Vitamin A | 180 IU (4% DV) |
🌡️ Food Safety Temperature Guide
| Stage | Temperature | Notes |
|---|---|---|
| USDA Minimum (Chicken Breast) | 165°F / 74°C | Safe to eat; my target is 160°F with carryover to 165°F during rest |
| USDA Minimum (Chicken Thighs) | 165°F / 74°C | Safe, but texture is better at 175°F when collagen breaks down |
| Recommended Breast Temp | 160–165°F / 71–74°C | Juicy and tender; will rise 5°F during resting |
| Recommended Thigh Temp | 175–180°F / 79–82°C | Collagen fully rendered; silky texture |
| First Phase Cooking Temp | 360°F / 182°C | Gentle roasting; protects breast meat |
| Second Phase Cooking Temp | 380°F / 193°C | Higher heat for skin crisping |
| Danger Zone | 40–140°F / 4–60°C | Do not hold cooked chicken in this range over 2 hours |
❄️ Storage & Reheating Guide
| State | Refrigerator | Freezer | Best Reheat Method |
|---|---|---|---|
| Air Fryer Whole Roast Chicken (uncarved) | Up to 3 days | Not recommended | Reheat whole at 350°F / 177°C in air fryer for 12–15 min |
| Carved chicken (with skin) | Up to 4 days in airtight container | Up to 3 months | Air fryer 350°F / 177°C for 6–8 min to re-crisp skin |
| Carved chicken (no skin) | Up to 4 days | Up to 4 months | Microwave with damp paper towel, 1–2 min intervals |
| Chicken carcass (for stock) | Up to 2 days | Up to 6 months | Simmer in water with vegetables for stock |
Note: Always reheat chicken to an internal temperature of 165°F / 74°C for food safety.
❓ FAQ
Can I cook a frozen whole chicken in the air fryer?
No. A frozen chicken will not cook evenly — the exterior will overcook before the interior thaws and reaches safe temperature. Always thaw completely in the refrigerator (24–48 hours depending on size) before dry-brining and roasting.
My air fryer basket is too small for a whole chicken. What should I do?
You have two options: buy a smaller Air Fryer Whole Roast Chicken (3 pounds or under), or spatchcock the chicken (remove the backbone and flatten it). Spatchcocking reduces the height and allows larger birds to fit, though you lose the classic presentation locking good Air Fryer Whole Roast Chicken.
What if I do not have time for the 12-hour dry brine?
You can get away with a 2-hour dry brine in a pinch, but the results will not be as good. The skin will not crisp as well and the seasoning will not penetrate as deeply. If you are truly short on time, generously salt the chicken inside and out, let it sit at room temp for 30 minutes, then pat dry and proceed.
Can I use a rotisserie attachment instead of flipping?
If your air fryer came with a rotisserie spit attachment, absolutely use it. The constant rotation eliminates the need for flipping and produces even more uniform skin crisping. Follow the same temperature guidelines related to Air Fryer Whole Roast Chicken.
Why is my Air Fryer Whole Roast Chicken skin still not crispy even after following the method?
Three common causes: (1) you did not dry-brine long enough, (2) the chicken was not patted completely dry before cooking, or (3) your air fryer basket is overcrowded and air cannot circulate. Make sure there is at least half an inch of clearance on all sides and enjoy your Air Fryer Whole Roast Chicken.
🔗 More From Homely Recipe
These articles (Air Fryer Whole Roast Chicken)pair perfectly with what you just learned:
🥔 [Air Fryer Crispy Smashed Potatoes] — The classic Sunday roast side dish. Crispy, golden, and ready in 20 minutes.
[Air Fryer Hard Boiled Eggs] (The No-Water Convection Method)
🥩 [Air Fryer Garlic Butter Steak Bites] — Master another high-protein main course using the same convection principles.